Trapet Precision Engineering
=> Services and Products
Before (this web page):
Eugen Trapet (Trapet Precision Engineering)
Berretin 10
01139 Sarria
Spain
Now:
Manufacturer of Trapet-PE Artefacts:
Data protection procedures:
We do not monitor or evaluate or store the personal data of visitors of our web pages. Direct communications e.g. by e-mail, whatsapp and in paper form with our clients or potential clients or providers are stored as needed for the preparation of offers, contracts, manufacturing of products, elaboration of doumentation and invoicing. Such data we store confidentially for an indefinite period of time. A client or provider may contact us via the above e-mail address and request a partial or complete deletion of such data. Should you by error receive an e-mail from us which was not meant for you, please delete it and inform us.
Ball Beams
Ball Beams:
up to 1 m
up to 3 m
disassemblable up to 12 m
Line Scales, Multi Sensor Ball Beams,
Mini Dumbbells, Circle Standards for Video CMMs
Dumbbells, Ball Beams and Planes with mat white
surfaces for fringe Projectors and Scanners
Tetrahedrons,
3D-Ball Beams,
Ball Cubes
Software Test Artefacts: Testing of correct evaluation of measurements according to GPS standatrds
CMM Error Compensation Parameter Measurements with Ball Beams
Calibration of CMM-artefacts in www.ISM3d.es
Ball Beams
ESCALON-Type
up to 1 m length
We make some of the largest and some of the smallest
artefacts for coordinate measuring machines (CMMs)
available on the market.
Most artefacts are made of High Young's Modulus carbon fibre composite,
vitro ceramics and alumina ceramics.
This guarantees a maximum of temporal
and thermal stability (very low CTE).
Our standard products are the Escalon Bars - for tactile and optical probing.
The shortest is 10 mm, the longest 3 m.
ESCALON HA
The most accurate ESCALON reference ball beam, made of NEXCERA Ceramics (Krosaki Harima Corporation, Japan).
The thermal expansion coefficient is smaller than 0.1 ppm/K and the long term stability is among that of the best non-monocrystalinavailable materials.
Here 1 m beam with 51 balls. The largest beams are 1.5 m (76 balls). |
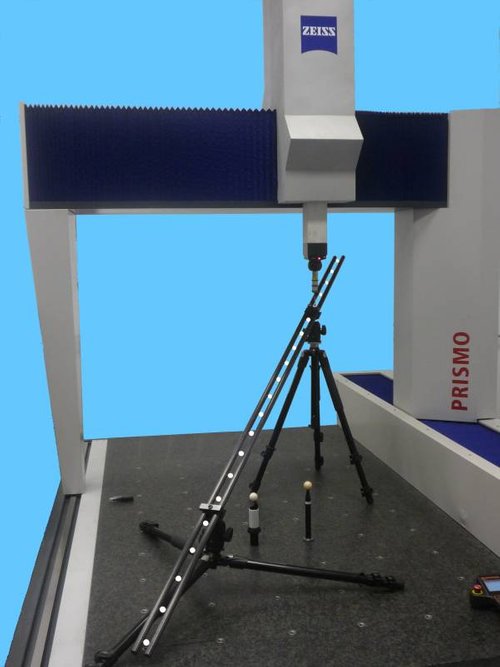
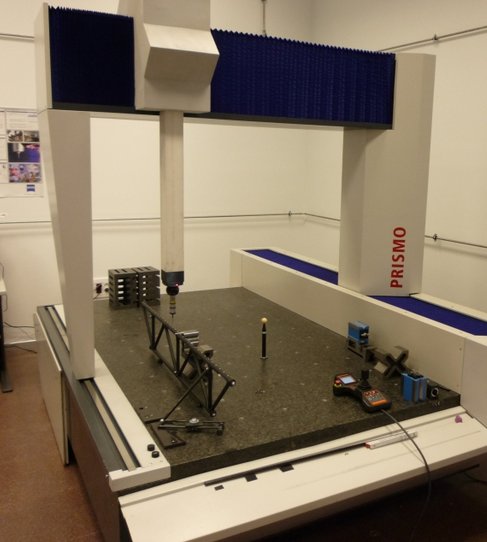
ESCALON Ball Beam on CMM
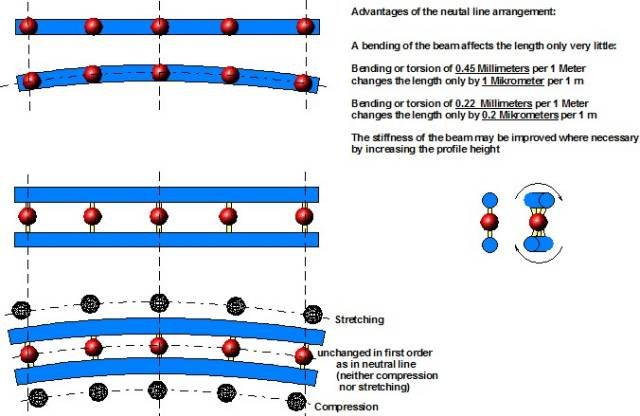
These bars are made of uni directional carbon fibre composite. The distances between the centres of the balls are calibrated. The balls lie in the symmetry line between the two beams of carbon fibre. This design yields high stability in the direction in which the bar represents the unit of length.
The thermal expansion coefficient of ESCALON ball bars is typically 0.2 . 10-6 K-1
ESCALON ball bars can be calibrated by different accredited and non-accredited laboratories.Uncertainties go down to 0.0002 mm + 0.5 . 10-6L.
Escalon Ball Bars
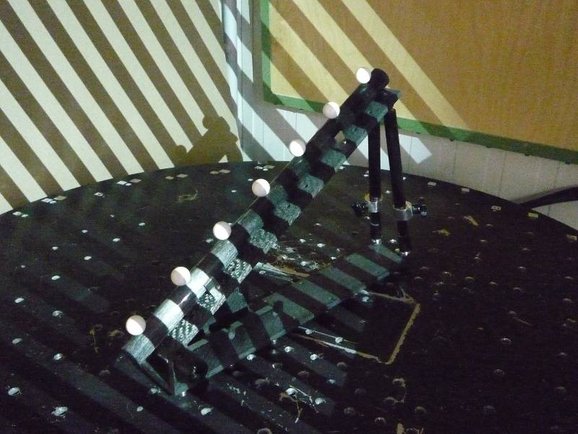
on inclination table of carbon fiber composite
For ESCALON ball bars different solutions are available to place them on the CMM
for measurement in different orientations and positions.
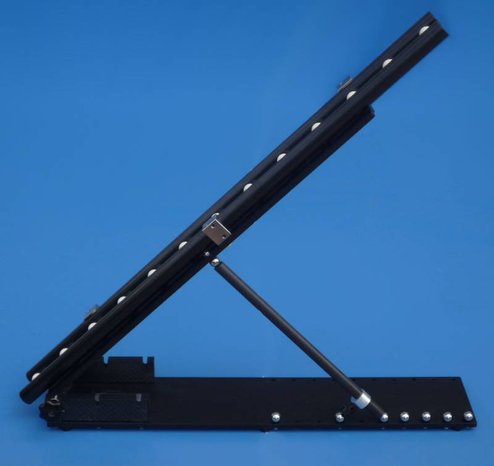
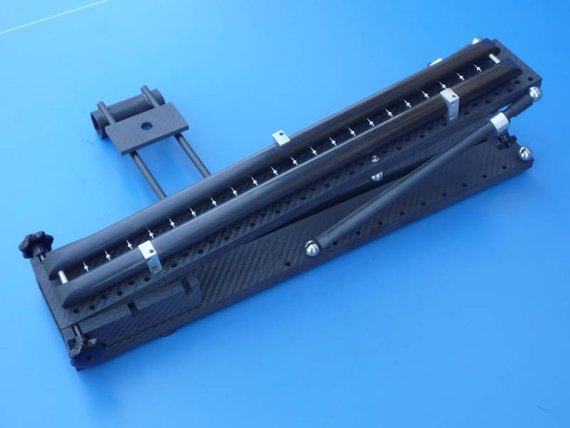
Here we see the inclination holder of carbon fibre composite.
With fixed magnetic rods or telescopic rods a great variety of inclination angles can be realized.
The inclination holder has a very small thermal expansion coefficient, hence no waiting after manipulating the holder is necessary.
Inclination holders serve for ESCALON Ball Beams typically up to 700 mm, exceptionally for 1000 mm beams. From 1000 mm beam lengths on, column type holders are preferable.
ESCALON Ball Beams
up to 3 m length
Diagonal and verical placement of 2 m ESCALON.
The vertical axis of the machine has only 1000 mm stroke
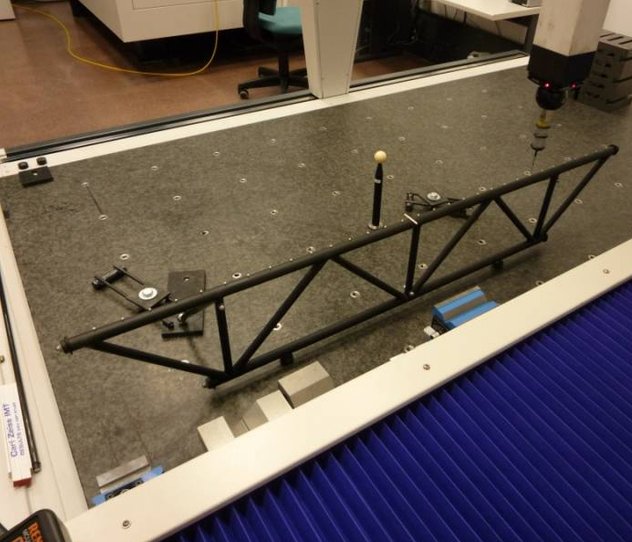
2.7 m long ESCALON Ball Beam on an 11 m x 2 m x 1 m CMM , in the 11 m long axis four stitched positions were measured
Note that the precision of shifting plays no first order role for the results.
2.1 m beam with precision joint in middle, on mounting tube and with column fixtures of carbon fibre
The bar can be rotated in holder; this facilitates measurement with offset probe stylus according to ISOO10360-2
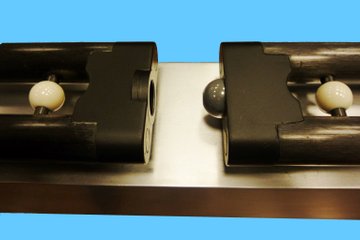
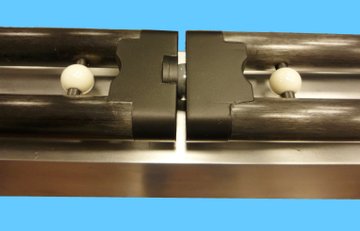
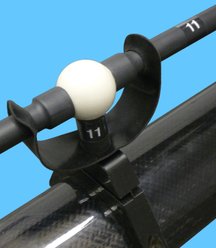
The joint is usually made of a ceramic ball and a ceramic ring, both precision-lapped to each other. Strong magnets hold the two bars together with a constant force
The precision joint repeats to about 0.0005 mm.
The length across the joint is calibrated.
Disassemblable
Ball Beams
up to 12 m length
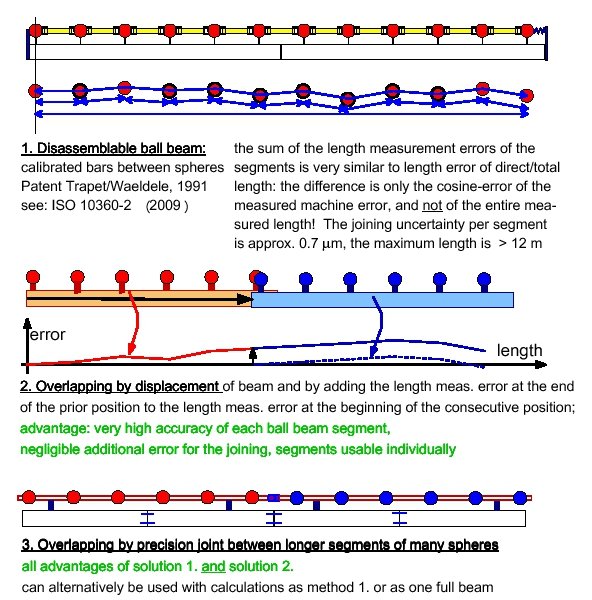
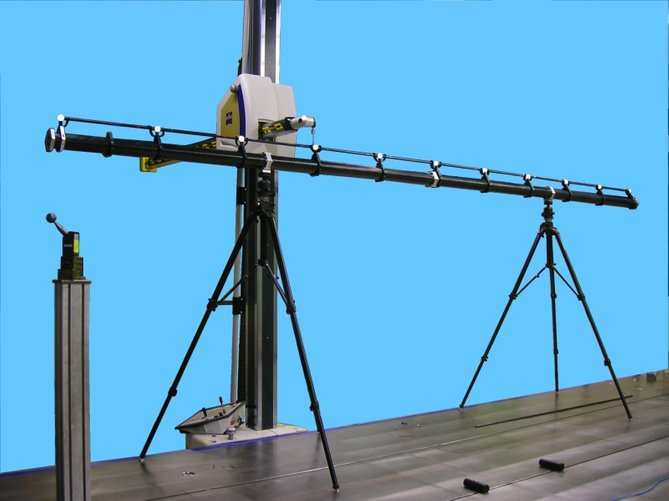
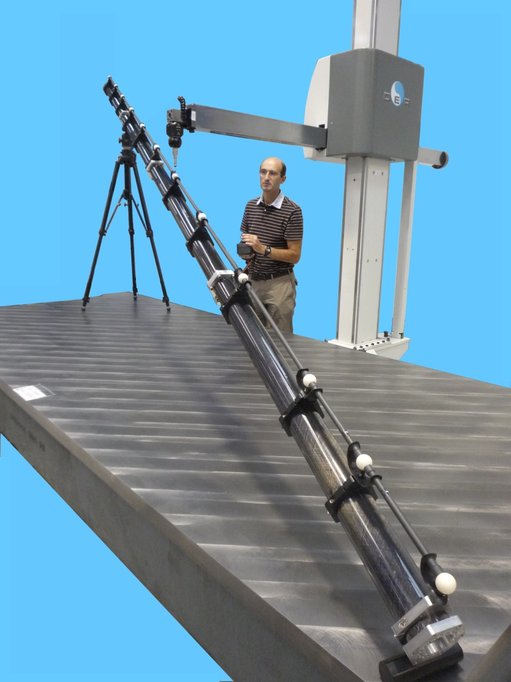
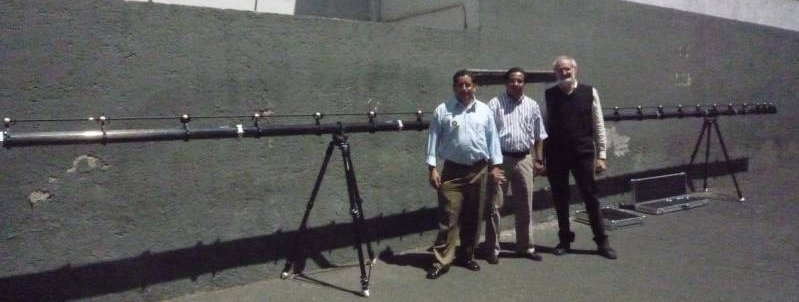
Our largest artefacts are segmented ball beams, lengths go up to 12 m,
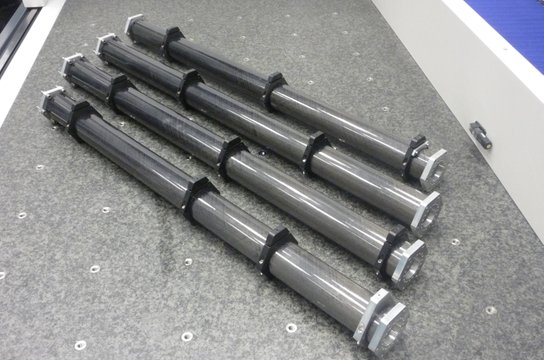
the base segments are typically 1.3 m long,
the calibrated reference bars are typically 0.5 m and 0.25 m long.
Courtesy
ZEISS Iberia
carbon fibre tripods with stabilization rods
Courtesy HEXAGON Spain
courtesy: ACCURATE India
first ball on fixed stem
intermediate ball on pivot spring and
between two calibrated rods
last ball on flat spring
and with load spring
Courtesy: Zeiss Mexico
Line Scales,
Multi Sensor Ball Beams,
Mini Dumbbells,
Circle Standards
for Video CMMs
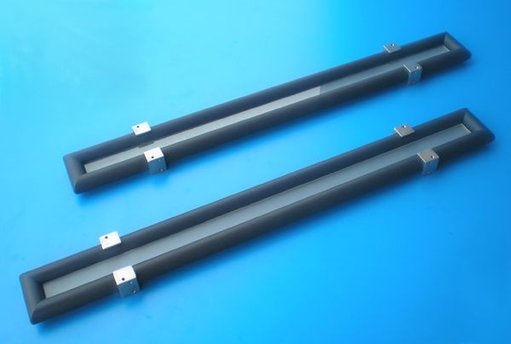
To our best knowledge there is no other comparable commercial (standard) product: Scales of near zero thermal expansion material and a fame of carbon fibre which has as well a near zero thermal expansion and a very good long term stability.
This is our standard product for optical CMM verification:
A line scale consisting of a chromium grating on vitro-ceramic; the vitro-ceramic plate is supported by a carbon fibre composite frame. This frame protects and maintains the thin vitro-ceramic plate flat, even when changing from horizontal to diagonal positions. Checking the CMM in diagonals is more and more demanded in CMM performance verifications and supported by the ISO 10360-7 (2011).
Alternatively one can use these small "Mini Escalon Bars" with 3mm spheres.
Such small spheres can be excellently probed by tactile and by vdeo systems.
Calibration can be by tactile measurement and the use of the bars can be for verifying video CMMs....
or vice-verse.
These bars are as well suited as reference artefacts for tomography, including for dental tomography systems.
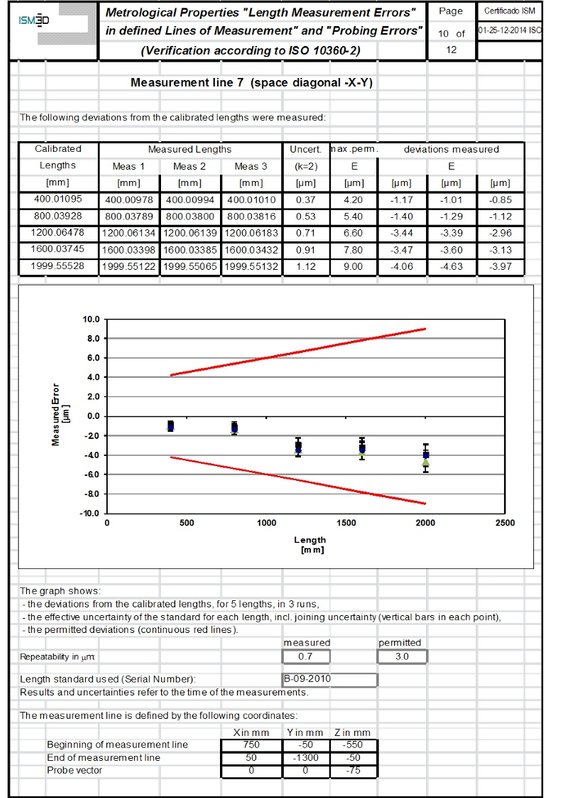
ISO 1036-7 verification of CMM in ISM3D (7 lines in 3D)
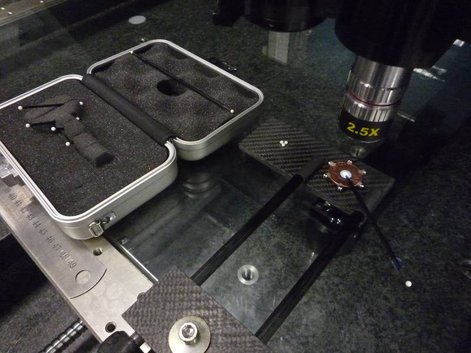
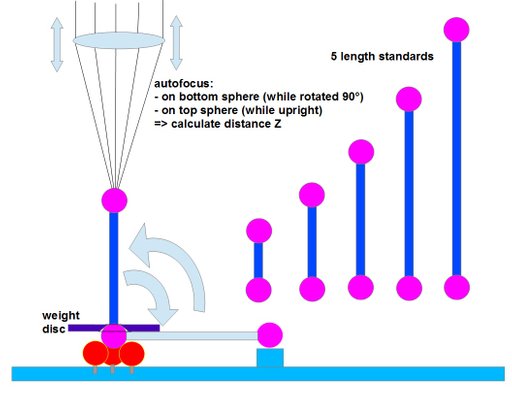
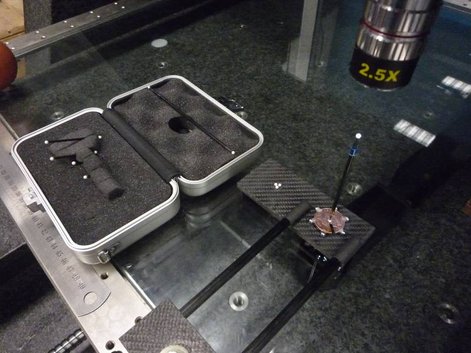
Miniature dumbbell bars are as well successfully used for the verification of CMMs with Video Autofocus (vertical axes). We believe that our miniature dumbbell method is the most suited one. Previous approches with gage blocks or stair step standards bring problems with them as weigt influence and measurement not only in Z-direction.
A circle standard plate (chromium-on-glass) is available.
The layout is shown here on the left with the diameters.
Such a reticule is required for ISO 10360-7 CMM verification. The circles are required to be larger than the field of view. Therefore several circle sizes are on our reticules.
Dumbbells,
Ball Beams and Planes with mat white surfaces for fringe Projectors and Scanners
Miniature Dumbbell Ball Bars on stand
These dumbbells here are mainly made for tomography system verification and calibration.
They serve as well as for small laser scanners and fringe projection systems if furnished with mat spheres.
On the right : different elastic fixtures for miniature dumbbells. Note that for tomography the fixture might cause problems if too thick or of materials with high atomic weight (relative to the "real object"). The thin clamps and the spheres of ruby on the dumbbells have proven particularly suitable.
10 mm to 200 mm length.
2mm or 3 mm balls.
White mat balls
with near zero
volume scattering
Here we have Dumbbell Ball Bars with balls of very low volume scattering ceramics and of aluminium balls with mat white
paint coating. The latter is a unique product feature of us.
These dumbbells are used for VDI 2634 verification of
laser scanners and fringe projection systems.
"Normal" ceramics smeer any projected image "downhill" and thus falsify the measurement results, in some cases by more than 0.1 mm.
Different diameters and lengths are possible.
The largest white and not-volume-scattering balls we make
are 160 mm in diameter;
their form error is typically <10 µm.
There is probably no competing product world wide.
The new ISO 10360-8 on verification of optical measurement systems
asks for more lengths to be measured than the VDI/VDE 2634.
Thus here on the left one sees our corresponding
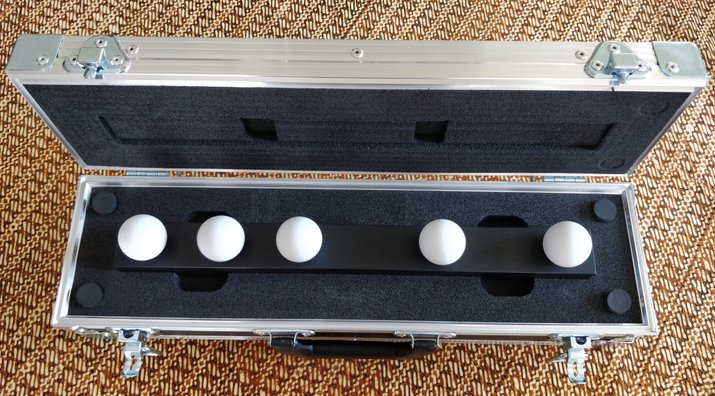
ball beam made with either "normal" spheres or mat steel spheres
or low volume scattering ceramic spheres.
For fringe projection the latter is indispensible.
VDI 2634 verification and ISO 10360-8 verification of optical measurement systems
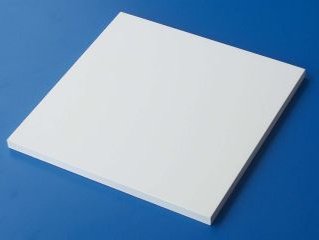
both ask for reference flats in the tests. The size of these flats must be 66% of the measuring
range of the instrument.
We deliver aluminum flats with lapped laque surface, up to 500 mm x 500 mm.
This is an almost non-volume scattering surface. The flatness is htypically
up to 200mm x 200mm: 5-6 µm
up to 300mm x 300mm: 7-8 µm.
up to 500mm x 500mm: 11-13 µm.
By measuring these artefacts it is possible to assess according to which criteria a given CMM siftware evaluates Form and Position Tolerances (GD&T). With other words: whether a software works according to the standardized GD&T principles.
For example one would get to know whether a CMM software package works with tangential elements or it works only with Gaussian Elements and one would need to establish conformity with ISO standards by certain workarounds.
Together with each software test artefact comes a documentation with the diverse reference solutions one would get from the evaluaion according to prevailing standards and as well according to traditional, often used criteria which are not 100% in conformity with standards. One can often judge from the results how the given CMM software works, and then think about workarounds for the daily use of this CMM software in order to produce results which are in conformity with the standards.
Often such workarounds consist in only few additional steps, as for example "shift a reference plane by half the form error".
Many software packages allow to verify form and position tolerances in conformity with standrds, but one needs to know exactly how to do this programming and there is no feed back whether one has done it right. With the new artefacts allow the measurment technician to demonstrate in a simple way that he is doing it right ... or needs to correct one´s strategy.
Trapet Precision has recently launched two software test artefacts.
1. Reference elements on prismatic parts (existing)
2. Reference elements on rotationally symmetric parts (in work)
3. Maximum Material Principle (planned)
These artefacts may be bought with calibration. Calibrations are performed by an ISO 17025 accredited laboratory.
For the calibrated values such reference solutions are supplied. If the artefacts are ordered "uncalibrated", then reference solutions are supplied for the "nominal systematic deviations".
Please note that the inbuilt systematic deviations are big, so that basic information about the functionality of one´s evaluation software platform and one´s proper (or improper) use of this software can be obtained. As well for training purposes, uncalibrated objects might be sufficient. We believe that these artefacts are a great help for training in GD&T.
CMM Error Compensation based on Ball Beam Measurements
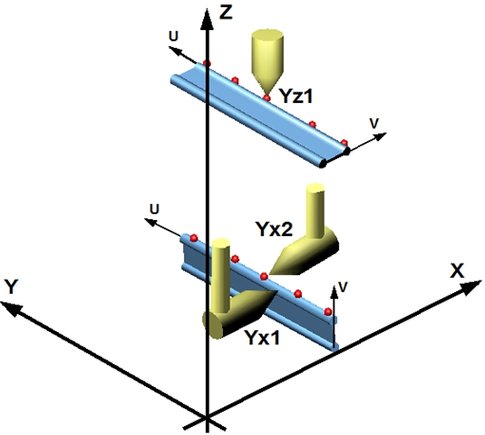
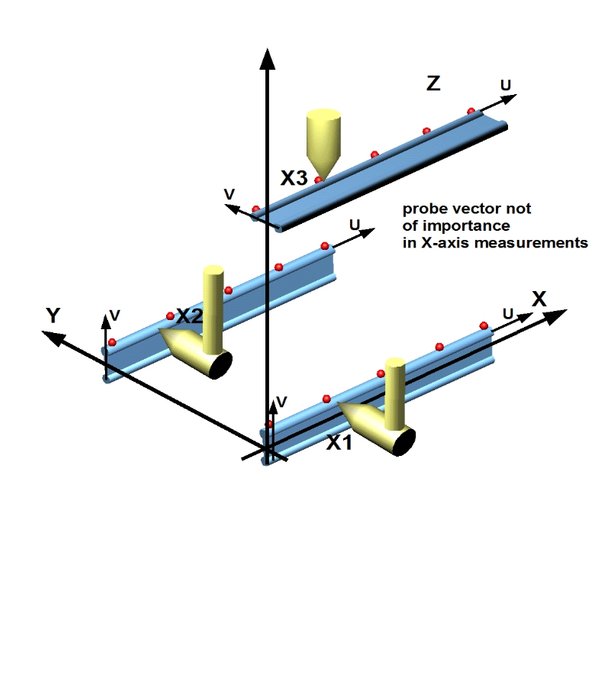
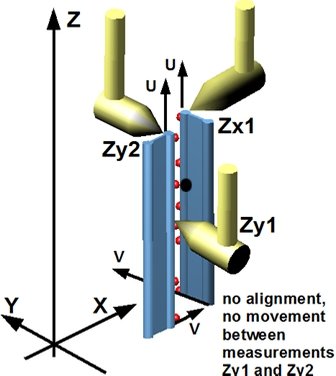
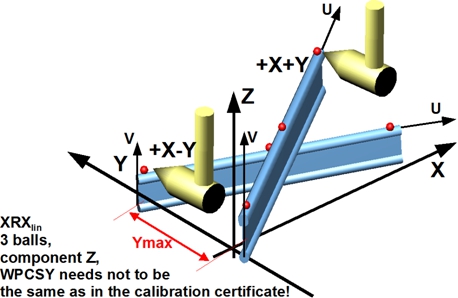
Now - besides the correction parameter measurement with ball and dot plates and 3D-ball beams, the correction parameter analysis from 2D ball beam measurement has been fully developed and successfully tested.
The measurements can be made by tactile probing and by optical probing.
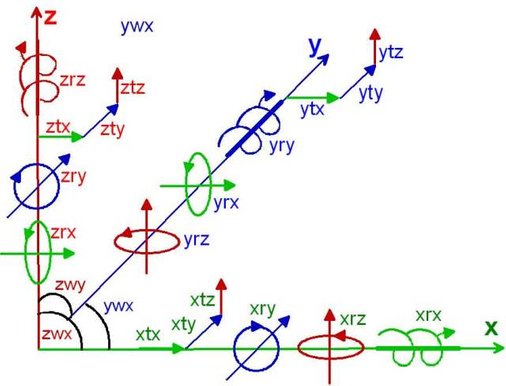
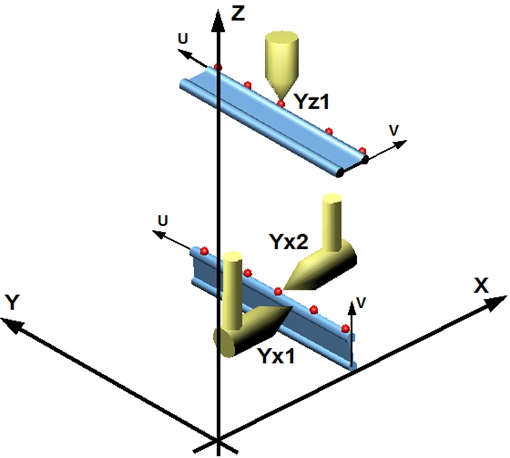
The below depicted positions yield all necessary information
for a full volumetric correction of CMMs as well as machine tools (3 Cartesian axes).
Machine error parameter measurement with a 2D ball beam and a camera is possible.
This method, i.e. using a camera, is faster than tactile measurements.
As the camera acts as a probe, this method can be used for machine tools (besides for measuring machines).
3D Artefacts
Ball Tetrahedrons ("QuickCheck-T")
Besides Tetrahedrons we make as well other 3D Artefacts, as for example Ball Cubes and 3D-Ball Beams. Please refer to the specific leaflets.
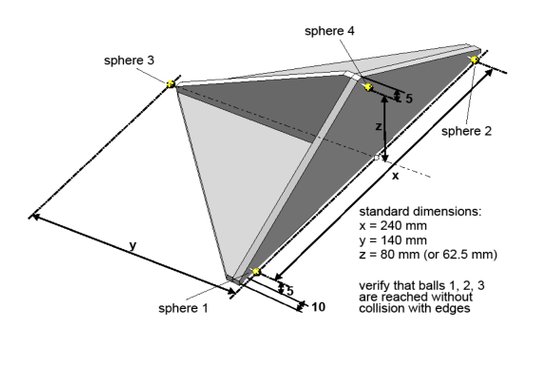
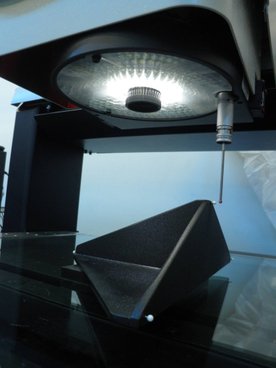
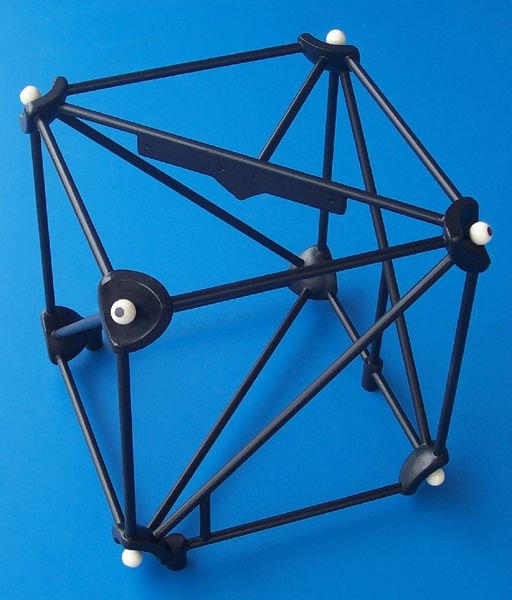
This is the standard tetrahedron with edge connectors of steel. Being very compact, these edge connectors don't contribute much to the thermal expansion coefficient of the tetrahedron, and the accessibility for probing is very good.
Performing a fast interim check with a tetrahedron costs only some 10 minutes.
Length measurement errors are verified in 6 different lines in the machine volume.
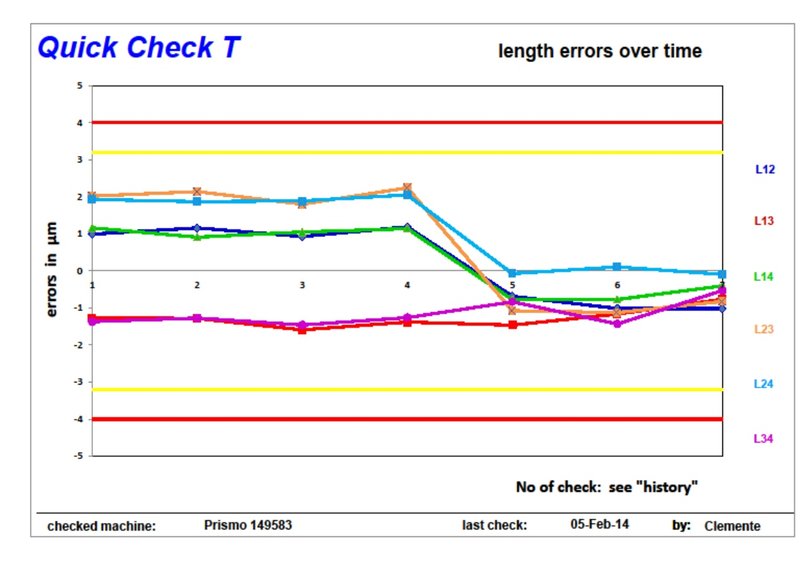
The evaluation of tetrahedron measurements is done by the application "QuickCheck-T". This application keeps track of the machine´s geometrical performance over time. Parameters to whatch are normally the measured length errors in comparison with the specified maximum length errors.
In the evaluation routine as well the 3 squareness errors and the 3 scale factor errors of the machine are calculated for the volume where the tetrahedron was placed.
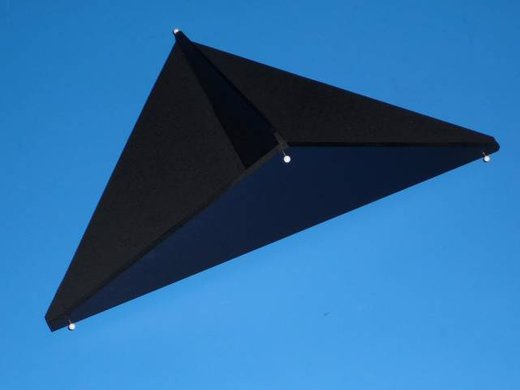
This "Mini Tetrahedron"is made of Vitro-Ceramics (Robax from Schott, zero thermal expansion). The balls have 2 mm or 3mm diameter and are good for actile as well as optical (video) measurement.
Disassemblable
Tetrahedron
without magnets
2 rods with ceramic balls, 4 rods with precision-lapped centering cones of ceramics
improved repeatability
Easy to calibrate: just send to the calibration lab. the 2 rods with fixed spheres (i.e. the number 1-2 and the number 3-4). Many laboratories are accredited for ball bar calibration.
Then perform a calibration of the other rod lengths on your own CMM by comparison: measure the tetrahedron in its coordinate system in three orientations, rotating the assembled tetrahedron in increments of 120°; average the results for each rod length. Apply correction. The correction is the difference between calibrated length and measured length.
For best accuracy repeat these 3 measurements all 3 times and disassemble and assemble in between the 3 sequences. In all make 9 measurements.
See downloadable
- Assembly Instructions
- EXCEL application for CMM Interim Checking with Tetrahedrons (requires password)
- Calibration Spreadsheet.
Tomograpy-suited Tetrahedron
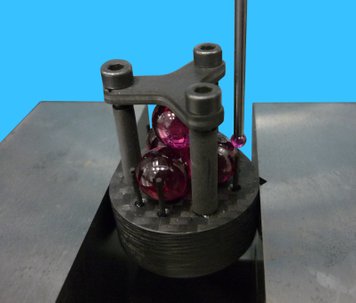
Miniature tetrahedron (10 mm balls) . The 4 ruby balls are pressed together by spring force.
They form a very reproduceable tetrahedron array. No glue is used.
The calibration is performed on the individual balls.
Only carbon fibre composite, plastic screws, tubes and ruby balls are used.
This is an excellent resolution test artefact as the balls' distance starts slowly growing from zero.
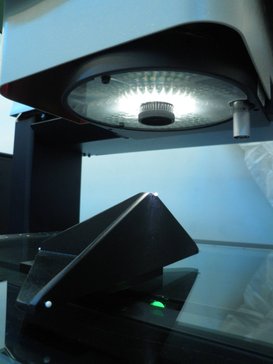
Optical measurement on a miniature tetrahedron (courtesy: Quality Vision Japan)
Tactile measurement of miniature tetrahedron (courtesy: Quality Vision Japan)
Ball Cube
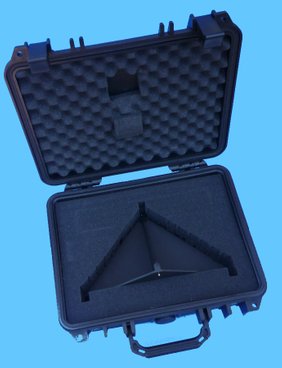
Multi-sensotr tetrahedron in transport box
With QuickCheck-T one may evaluate the length measurement errors and
machine geometry parameters, using measurement data obtained with the tetrahedron.
Length measurement errors are recorded as the difference between measured and
calibrated ball distances (with sign). The machine geometry errors are: scale factors X,
Y, Z as well as squareness errors between the axes YX, ZX, ZY.
One may store these results in a history sheet and review the changes of the CMM
over time (similar to a process control chart).
Data are normally entered by copy-pasting as there are only 6 values to be transferred from the CMM
user surface to the QuickCheck-T user surface.
Note that usually only the last digits change from inspection to inspection.
Once all data have been entered, we press the button "Add results to history"
and the history sheet is amended by a new record line with all data needed for a thorough
"traceability".As well the three graphics are amended (position, squareness, maximum length error).
Ball Cube
Allows for very thorough checks and analysis of machine performance
Can be displaced in steps for error map creation
3D-Ball Beam
This 5 m 3D ball beam could not be calibrated on a 2 m long CMM (photograph above), even with stitching technique it did not come out well. Thus we went to the Spanish National Metrology Laboratory CEM, where they have a high accuracy Laser Tracker. With dedicated set ups we managed (photograph below).
This is probably not only our, but as well the world´s largest 3D ball beam.
Calibration of artefacts in www.ISM3d.es
In the following our accreditation certificate (in Spanish)
and our scope of accreditation are displayed.
Nearly all the here shown artefacts can be calibrated in our laboratory
ISM3D with ISO 17025 accreditation by ENAC, the Spanish accreditation entity.
